Rick_in_UT
New Member
I know this thread already has great content, but I wanted to share my own build in hopes that it might inspire others or in case someone needs a summer project! I'm happy to answer any questions.
I have a ~4 year old sulcata named Jerry and we live in Salt Lake City, UT. For the last few years I kept him inside during the winter, but not only was his enclosure too small... he obviously made my room stink and he was super loud! Also, in the winter his eating would slow down and he would become lethargic, which I attribute to the lack of natural sunlight. I have a vitamin D lamp and place him in a sunny corner of my house but it still wasn't enough. So, I decided to make him a house!
In total I think this project cost me about $1,000. That includes all of the accessories lights, heating pad, thermostat, wheels, etc.
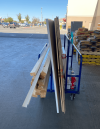
I tried to use 2x3s whenever possible to keep costs and weight down. I started out by building an insulated 4x8 base using 1/2" plywood, 2x3s and some 1.5" foam. the foam is glued in using liquid nails.


I used liquid nails or caulk on all of the floor joists and edges to keep the plywood tight and seal any gaps. It's all held together with 2" screws.

Once the floor was built, I started framing up the walls. I wanted it to be tall enough for me to crawl into to clean (if necessary) or to retrieve Jerry if he was ill or something happened, so it's roughly 2' on the low side and 3' on the high side.

From here forward I must've been in a hurry as I'm light on photos! Once I got it framed, I put "shred board" style exterior sheathing on the outside. I then started to insulate the inside with R13 attic insulation. Next up was interior walls!

I used 1/4" underlayment for the interior walls. I also used a sheet of white, plastic, wall covering (like you see in public restrooms) as the floor to keep it waterproof (not pictured). Jerry seemed to like it.

After that, I built the roof in the exact same fashion as the floor, but I used 2x4s so that I could use the R13 insulation. I attached the roof with hurricane ties and used great-stuff to fill any gaps around the edges..

It has to be portable as I plan on moving it to storage during the summer months so I added those wheels from Harbor Freight. They're attached with 3" lag bolts that go into the studs.
I made a custom door that is also insulated. I also added a bubble style skylight so he can get more direct sunlight.

Inside I have 1 heat lamp (vitamin D bulb), 1 ceramic heat bulb, a zoo-med reptile mat and a small space heater. The mat is on all the time, but the light and heaters are on a thermostat timer. I had intended to create a hide within the enclosure but I never got around to it. I will this summer! I also still need to add exterior trim around the door, corners and windows.
Overall, I think Jerry loves it and he doubled in size over the winter so that's a good sign.

If you have any questions or are considering taking on your own build, let me know how I can help! If you have basic tools (circular saw and drill) you could knock this out in a few weekends!
I have a ~4 year old sulcata named Jerry and we live in Salt Lake City, UT. For the last few years I kept him inside during the winter, but not only was his enclosure too small... he obviously made my room stink and he was super loud! Also, in the winter his eating would slow down and he would become lethargic, which I attribute to the lack of natural sunlight. I have a vitamin D lamp and place him in a sunny corner of my house but it still wasn't enough. So, I decided to make him a house!
In total I think this project cost me about $1,000. That includes all of the accessories lights, heating pad, thermostat, wheels, etc.
I tried to use 2x3s whenever possible to keep costs and weight down. I started out by building an insulated 4x8 base using 1/2" plywood, 2x3s and some 1.5" foam. the foam is glued in using liquid nails.
I used liquid nails or caulk on all of the floor joists and edges to keep the plywood tight and seal any gaps. It's all held together with 2" screws.
Once the floor was built, I started framing up the walls. I wanted it to be tall enough for me to crawl into to clean (if necessary) or to retrieve Jerry if he was ill or something happened, so it's roughly 2' on the low side and 3' on the high side.
From here forward I must've been in a hurry as I'm light on photos! Once I got it framed, I put "shred board" style exterior sheathing on the outside. I then started to insulate the inside with R13 attic insulation. Next up was interior walls!
I used 1/4" underlayment for the interior walls. I also used a sheet of white, plastic, wall covering (like you see in public restrooms) as the floor to keep it waterproof (not pictured). Jerry seemed to like it.
After that, I built the roof in the exact same fashion as the floor, but I used 2x4s so that I could use the R13 insulation. I attached the roof with hurricane ties and used great-stuff to fill any gaps around the edges..
It has to be portable as I plan on moving it to storage during the summer months so I added those wheels from Harbor Freight. They're attached with 3" lag bolts that go into the studs.
I made a custom door that is also insulated. I also added a bubble style skylight so he can get more direct sunlight.
Inside I have 1 heat lamp (vitamin D bulb), 1 ceramic heat bulb, a zoo-med reptile mat and a small space heater. The mat is on all the time, but the light and heaters are on a thermostat timer. I had intended to create a hide within the enclosure but I never got around to it. I will this summer! I also still need to add exterior trim around the door, corners and windows.
Overall, I think Jerry loves it and he doubled in size over the winter so that's a good sign.
If you have any questions or are considering taking on your own build, let me know how I can help! If you have basic tools (circular saw and drill) you could knock this out in a few weekends!