Redfoot Indoor Enclosure, Swedish Style !!!

Status
Not open for further replies.

Geochelone_Carbonaria

Active Member
10 Year Member!
Joined
Aug 19, 2010
Messages
618
Location (City and/or State)
Southern part of Sweden
Well, here is the explanation why my outdoor enclosure has been put on hold for a while...

I've decided that the RF family have to have more space and two new terrariums that will be much bigger than the ones I have in my garage. And since the humidity is too high in the garage (for other stuff), I will move everything to a separate 120 sqft room, where I'm going to build two new LARGE terrariums of approx 45 sqft each in 2 floors. All dedicated to the RF's and this is going to be my new "Red-Room" :D !!!

Since I love to do carpentry work, high tech stuff and RedFoots, this is a combination of stuff that I really will enjoy to do...

The two terrariums will be identical, one on top of the other, with humidity control, heat control and one attached rain system to each of them working independantly.

Here is the former store room where I used to have a shelf with stuff for the garden.

Terrarium1.JPG Terrarium2.JPG Terrarium3.JPG

The walls has been covered with a moisture barrier of rubber paint that is normally used for building bathrooms, and all the framework and wood has been painted with a transparent marine coating that they use on boats and ships.

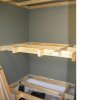
Terrarium4.JPG Terrarium5.JPG Terrarium6.JPG

The floor will also get a moisture barrier and a special "carpet" that is laminated into the rubber stuff. All cables will be going under the top in each terrarium.

Terrarium7.JPG Terrarium8.JPG Terrarium9.JPG


There will be ventilation and fans at the front, and the humidity and heat controls will be placed at the front of each. I'm now working on the cables for the electrical stuff, and I've just ordered 6 millimeters of plexiglass from Denmark for the front. Each terrarium will be having two sliding panes at the front (is plexiglass what you call it in US too?) I didn't have time to take any more pictures yesterday, but I will try later tonight. This is really fun work ;)
 
Last edited by a moderator:

Geochelone_Carbonaria

Active Member
10 Year Member!
Joined
Aug 19, 2010
Messages
618
Location (City and/or State)
Southern part of Sweden
Did some cabelling this evening. Lots of cabels already for feeding the daylight+nightlight+permanent power+heating etc...

Terrarium10.JPG Terrarium13.JPG

And then I put the grids and the fans in place on the front panel

Terrarium11.JPG Terrarium12.JPG

This is where the plexiglass is going to slide

Terrarium15.JPG

And some of the stuff I ordered arrived today; both the two rain systems, but only some of the control equipment

Terrarium14.JPG
 
Last edited by a moderator:

CtTortoiseMom

New Member
5 Year Member
Joined
Jan 17, 2011
Messages
4,515
Location (City and/or State)
CT
Wow, that is a ton of work and great idea's! I cannot wait to see it finished!
 

DesertGrandma

Well-Known Member
10 Year Member!
Joined
Apr 30, 2011
Messages
2,131
Location (City and/or State)
Arizona
Can't wait to see your completed room. Quite an ambitious project.
 

Tropical Torts

Member
10 Year Member!
Joined
Apr 7, 2010
Messages
996
Location (City and/or State)
Northwest FL
This whole project is absolutely amazing! I am going to have to do something like that over this summer to be prepared for the winter time. I wish I had the skill set to accomplish such an intricate enclosure like yours. Where did you get the rain systems from? And how are you doing the wiring? Great job MIke!
 

Geochelone_Carbonaria

Active Member
10 Year Member!
Joined
Aug 19, 2010
Messages
618
Location (City and/or State)
Southern part of Sweden
jrcrist4 said:
This whole project is absolutely amazing! I am going to have to do something like that over this summer to be prepared for the winter time. I wish I had the skill set to accomplish such an intricate enclosure like yours. Where did you get the rain systems from? And how are you doing the wiring? Great job MIke!

I bought the rainsystems from a Swedish web-site, where I normally buy everythng since they have a "we are cheapest guarantee" and they have all the well known brands there, called www.reptillagret.se. I'm not sure where they get the rain systems though since they have their own logo on them, but I think it's a small supplier/manufacturer. However, they don't cost more than 150 Euro "ish". I think I've seen a similar system on a Dutch web-site, but I cannot remember the name and I don't have a link to it...

I had to think a bit regarding the wiring... I thought I had to devide them into different groups :
1.Daylight (all the fluorescent lamps, attached to a timer)
2.Nightlight (small bulbs with red and blue light, attached to a timer)
3.Heating (you know all about this)
4.Permanent (if something inside should be on all the time, like heating above the "nesting corner")

There will also be a fifth group outside that is permanent, feeding all equipment placed outside the terrariums (like the rain systems and other control stuff).

Then I will connect the heat control to group #3 and the humidity control will be fed from the outside (but measured from the inside) and attach to them is the rain systems.

I do it all with what we call "IP65" here, and that means that everything can be used in "wet areas" and is connected to "earth" (of course).

I have probably missed out something, but I've tried not to. I've picked up ideas from all the RF books I've read and also a lot here thanks to all you guys on the site.

All I try to do here is to create or reproduce the RF's natural environment, which is nearly impossible, but I'm doing my best just to make my RF's happy and healthy ;)


jrcrist4 said:
This whole project is absolutely amazing! I am going to have to do something like that over this summer to be prepared for the winter time. I wish I had the skill set to accomplish such an intricate enclosure like yours. Where did you get the rain systems from? And how are you doing the wiring? Great job MIke!

Found it !

the system I bought is actually called "Jewelspray" and they come from Netherlands. They have a web-shop too :

http://jewelspray.nl/en/component/virtuemart/?page=shop.browse&category_id=6

And thanks a lot John !
 

Tropical Torts

Member
10 Year Member!
Joined
Apr 7, 2010
Messages
996
Location (City and/or State)
Northwest FL
Thanks for the explanation Mike. Im not very good with the wiring part so im still confused but I am researching it a little bit more to help me understand it. I just buy the fixture and then plug it into an outlet. I am going to have to find another website for the misters though because i only speak English and i have no idea what language that is on those sites you gave me:) This thread is very interesting to me and i cant wait to see what you finish next, keep us posted.
 

Geochelone_Carbonaria

Active Member
10 Year Member!
Joined
Aug 19, 2010
Messages
618
Location (City and/or State)
Southern part of Sweden
jrcrist4 said:
Thanks for the explanation Mike. Im not very good with the wiring part so im still confused but I am researching it a little bit more to help me understand it. I just buy the fixture and then plug it into an outlet. I am going to have to find another website for the misters though because i only speak English and i have no idea what language that is on those sites you gave me:) This thread is very interesting to me and i cant wait to see what you finish next, keep us posted.

Sorry John, I didn't think about the language since I speak more than one.

But the last one from Netherlands should have an english flag so you can switch language ? My guess is that they ship overseas, but the shipping cost might be a bit high ? On the other hand, I have bought stuff from the U.S several times and it's not THAT bad after all ?

My suggestion is that you send them an email and ask ?
 

Geochelone_Carbonaria

Active Member
10 Year Member!
Joined
Aug 19, 2010
Messages
618
Location (City and/or State)
Southern part of Sweden
I've been working on the wiring this weekend, so not much to show picture wise, but all I can say is that there is more than meets the eye here ;) This is very time consuming work.

The plexiglass will arrive later this week from Denmark, hopefully.

I will add new pictures as soon as the wiring is done...
 
Status
Not open for further replies.

New Posts

Top