A few years ago I built a mini version of @Tom 's heated tortoise house. Seen here:
http://www.tortoiseforum.org/threads/leopard-tort-house.90297/
It worked very well and I couldn't have done it without the tips from TFO. However, after the move from CA and enduring 3 winters here in Oregon (not to mention a growing tortoise) it was clear that I needed to make a new one with some modifications for my climate.
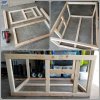
I started by assembling the frame. I used 2x3s and the house dimensions are 4' long x 3' wide x 2' tall. I would have liked to do a 4x4 for the extra space and less scrap wood BUT I needed it to fit through my yard gate and be manageable for me to move.
I attached the exterior siding next.
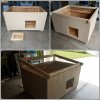
Here is where I made the first change. The flat roof worked in sunny SoCal but between Medford's rainy days and being covered in 2ft of snow this past winter (which made me quite nervous..) I decided to give it a slanted roof. It took me some time to figure out exactly just how to do that though. I'm a stay at home mom NOT a handy man and yeah maybe I cried a few times...But eventually I figured it out. Ha!
Last time I used the rigid foam insulation boards. This time I bought a roll of the "puffy stuff". (See, I'm proving my point that I really don't know what I'm doing lol) Then I attached the inner plywood walls.
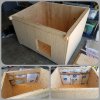
I caulked everything. Every crack, inside and out, before insulation and after with an exterior seal and bond "something-something" type of caulk. I wanted to ensure my walls stayed sealed and the insulation protected.
I also painted the interior with an exterior paint to protect the plywood from moisture caused by the damp substrate and humid air.
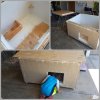
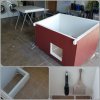
Mid painting, my 7 year old checking out the doorway.
I used a 2x8 to frame where the oil filled radiator will sit and a 2x4 scrap piece as a shelf for the thermometer/hydrometer.

The paint was allowed to dry for a full week before I continued working on it.
Next I painted the exterior using the Valspar Storm Coat exterior paint and primer. As much as I loved the green color I had used to paint his first house, I couldn't stand to waste this red paint. I built a chicken coop this spring and after painting that, still had most of the gallon left. So, a matching coop and tort house it is!
I started laying down vinyl flooring and used hooks for the pooper scooper and brush.
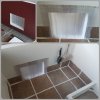
I added 3 overlapping layers of clear vinyl strips in the doorway, finished the flooring and added lots of caulk where the tiles connect. It's ugly, I know. Did you know that the clear caulk starts off white and then dries clear? Well, white caulk also starts off white but then it dries white. LOL. I thought I was using the clear caulking tube until I was practically finished. Oops. Oh well. If there is ever a next time, I'll double check the label! It's going to be covered with damp substrate anyway. So, I only lost a little bit of sleep over it.....grrr..
I decided to break down his current house since I'm almost done with the new one. It's super hot here right now so I can take advantage of the weather for this transition.
Levi said goodbye to his old flooring...

Most of his old house (the unpainted parts) was burned in our 4th July campfire. and the goodies were moved over to the new house. I shingled the roof and am so close to being done!
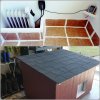
This week I'll add the weather stripping, attach the roof and door with hinges then move it to the backyard.
The tort door will have roof shingles and open upwards like an awning. The ramp style door and wet Oregon ground didn't get along very well.
Oh and I'll be using a hole saw drill bit to feed my power cord in at the bottom rather than taking it up and over the wall.
I plan on giving him a light and feeding station before winter comes and a greenhouse is still on my wish list.
Until I get this thing finished, Levi is sleeping in a tote in the garage. The temps are fine so I told him to pretend he's camping

More pics upon completion!
Thanks for looking and I hope these tips can help anyone else crazy enough to keep an African tortoise in a climate with cold seasons.

http://www.tortoiseforum.org/threads/leopard-tort-house.90297/
It worked very well and I couldn't have done it without the tips from TFO. However, after the move from CA and enduring 3 winters here in Oregon (not to mention a growing tortoise) it was clear that I needed to make a new one with some modifications for my climate.
I started by assembling the frame. I used 2x3s and the house dimensions are 4' long x 3' wide x 2' tall. I would have liked to do a 4x4 for the extra space and less scrap wood BUT I needed it to fit through my yard gate and be manageable for me to move.

I attached the exterior siding next.
Here is where I made the first change. The flat roof worked in sunny SoCal but between Medford's rainy days and being covered in 2ft of snow this past winter (which made me quite nervous..) I decided to give it a slanted roof. It took me some time to figure out exactly just how to do that though. I'm a stay at home mom NOT a handy man

Last time I used the rigid foam insulation boards. This time I bought a roll of the "puffy stuff". (See, I'm proving my point that I really don't know what I'm doing lol) Then I attached the inner plywood walls.

I caulked everything. Every crack, inside and out, before insulation and after with an exterior seal and bond "something-something" type of caulk. I wanted to ensure my walls stayed sealed and the insulation protected.
I also painted the interior with an exterior paint to protect the plywood from moisture caused by the damp substrate and humid air.

Mid painting, my 7 year old checking out the doorway.
I used a 2x8 to frame where the oil filled radiator will sit and a 2x4 scrap piece as a shelf for the thermometer/hydrometer.

The paint was allowed to dry for a full week before I continued working on it.
Next I painted the exterior using the Valspar Storm Coat exterior paint and primer. As much as I loved the green color I had used to paint his first house, I couldn't stand to waste this red paint. I built a chicken coop this spring and after painting that, still had most of the gallon left. So, a matching coop and tort house it is!
I started laying down vinyl flooring and used hooks for the pooper scooper and brush.

I added 3 overlapping layers of clear vinyl strips in the doorway, finished the flooring and added lots of caulk where the tiles connect. It's ugly, I know. Did you know that the clear caulk starts off white and then dries clear? Well, white caulk also starts off white but then it dries white. LOL. I thought I was using the clear caulking tube until I was practically finished. Oops. Oh well. If there is ever a next time, I'll double check the label! It's going to be covered with damp substrate anyway. So, I only lost a little bit of sleep over it.....grrr..

I decided to break down his current house since I'm almost done with the new one. It's super hot here right now so I can take advantage of the weather for this transition.
Levi said goodbye to his old flooring...

Most of his old house (the unpainted parts) was burned in our 4th July campfire.

This week I'll add the weather stripping, attach the roof and door with hinges then move it to the backyard.
The tort door will have roof shingles and open upwards like an awning. The ramp style door and wet Oregon ground didn't get along very well.
Oh and I'll be using a hole saw drill bit to feed my power cord in at the bottom rather than taking it up and over the wall.
I plan on giving him a light and feeding station before winter comes and a greenhouse is still on my wish list.
Until I get this thing finished, Levi is sleeping in a tote in the garage. The temps are fine so I told him to pretend he's camping

More pics upon completion!
Thanks for looking and I hope these tips can help anyone else crazy enough to keep an African tortoise in a climate with cold seasons.


