I have been busting my little butt for a month and a half now but FINALLY, my 'easy' closed chamber for my leopard tortoise, Gumbo. I wanted to share what I did with you all in hopes of helping someone out that found themselves in the situation I did when first looking to purchase a tortoise - thinking I could keep it in a tort table. Thankfully because of my amazing breeder, @Jodie, I was directed here and making changes before he even came home.
Here's what I have -
- 6ftx3ft floorspace
- 80-100F during the day, 80-90F at night
- 70-75% humidity (working on raising this) during the day and 90% overnight
Supplies -
- 6x3x3 Portable Greenhouse ($50)
- 3x Heavy Duty Outdoor Bins ($30/ea)
- Tarp ($10)
- 2.5 cu/ft Compressed Organic Coco Fiber ($15)
- 2 cu/ft Compressed Organic Coco Bark ($15)
- 4x Clamp Lights ($15/ea)
- Appropriate Bulbs/CHEs ($5-20/ea)
- Thermostat ($30)
- Temp Gun ($15)
- Flowerpots ($4/ea)
- Hot Glue/Gun
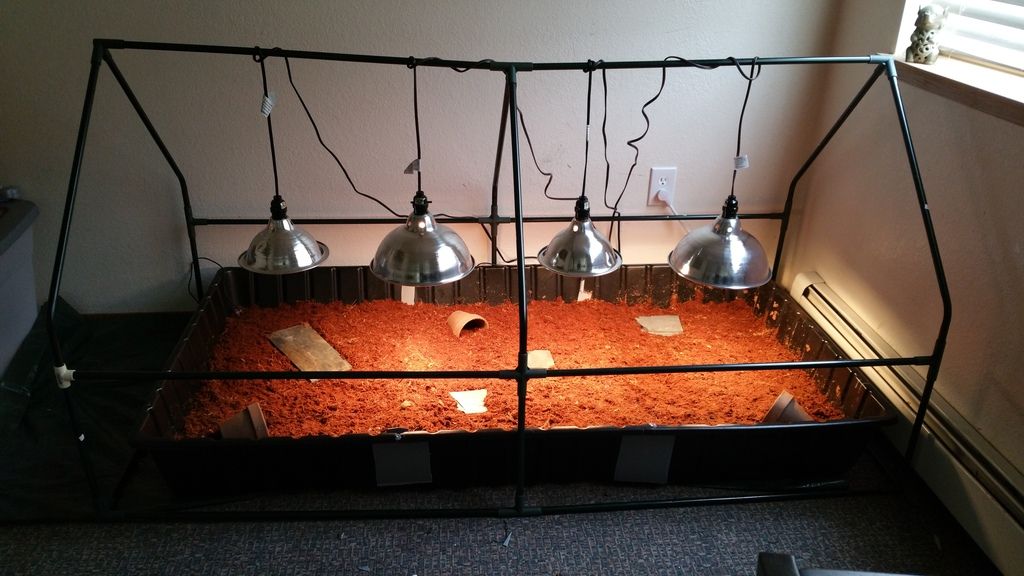
I started off with the tarp down, a few lights and a sweater box (all under the greenhouse) while I collected the supplies for his upgrade. This worked fine but keeping up the humidity was an uphill battle. Once I finally had all of my supplies, I began cutting the sides off my bins so they could be attached to make one large bin. I do not have access to power tools and my local hardware store was honest and told me they can't make accurate cuts. I used pocket saws to cut out the area I wanted on each of the bins. Once the sides were removed, I secured them together with hot glue, patching any holes with the lid of a rubbermaid container. I made sure ALL cut edges were thoroughly coated with hot glue so if for any reason they surfaced he would not get hurt. This was one of the hardest parts for me, although I'm sure it'd be easier if you had clamps to hold the bins together for you while each section of glue dried. Once that was done, I began soaking the coir bricks, mixing the bark and coir together thoroughly and draining any excess water. 10lb bricks from my local hydroponics shop were the way to go and I love the quality difference between this and pet quality bricks. It's night and day. Once that was complete, I slid the bins over the tarp (to protect my carpet from condensation). I placed the frame of the greenhouse over the bin and got all of my lights arranged and plugged in because of where my outlet is placed. Once I had everything situated, I got everything turned on, let it heat up to 80F and placed him in.
Even though my little man is a 3 months old hatchling, he uses EVERY INCH of this enclosure. I'd go as far to say he loves it and I could NOT be happier watching him literally run from one end to the other, trample his cactus pads, use his new hides and go on with life as a spoiled hatching. The only things we are currently having trouble acquiring because of our location is a digital hydrometer, a second CHE and a UVB bulb but we're working on it and he's being taken outside 3x weekly for UVB at the moment. All in all, this wasn't easy for me due to lack of power tools and a few personal reasons but I felt this was a fairly cheap, easy method others could benefit from.
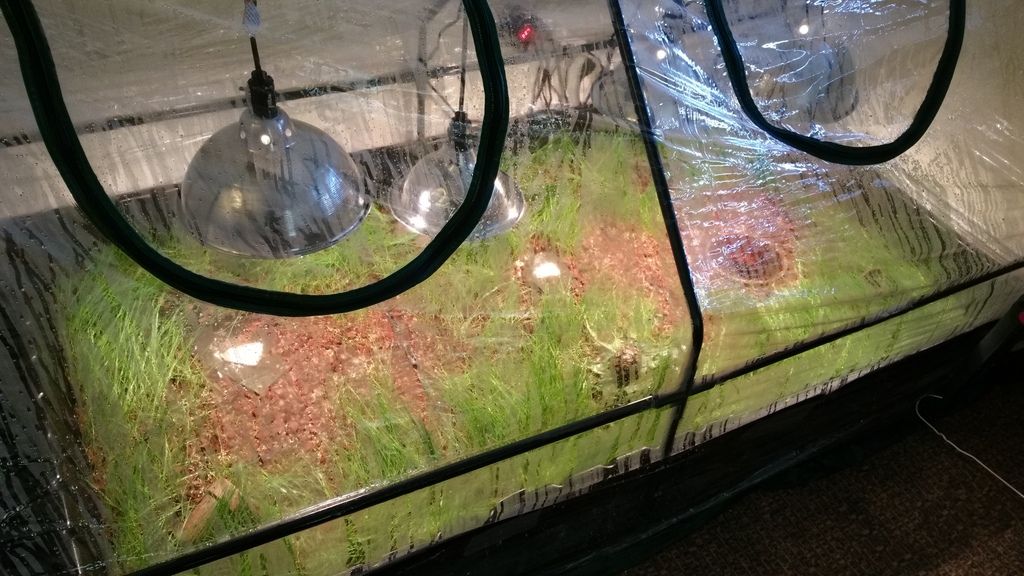
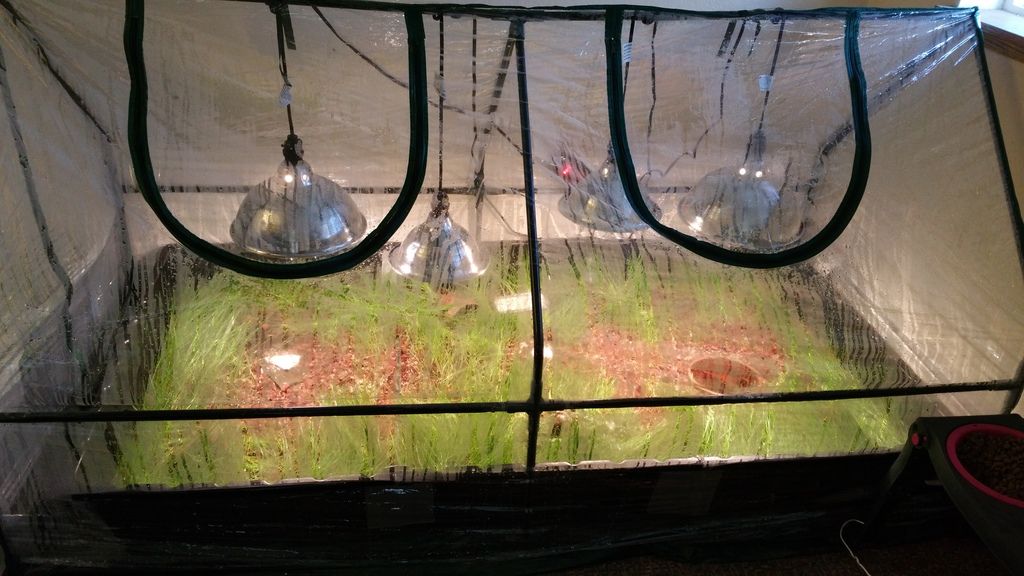
Obligatory photo of my little man and photos of the enclosure both with and without the plastic covering added for easier viewing -
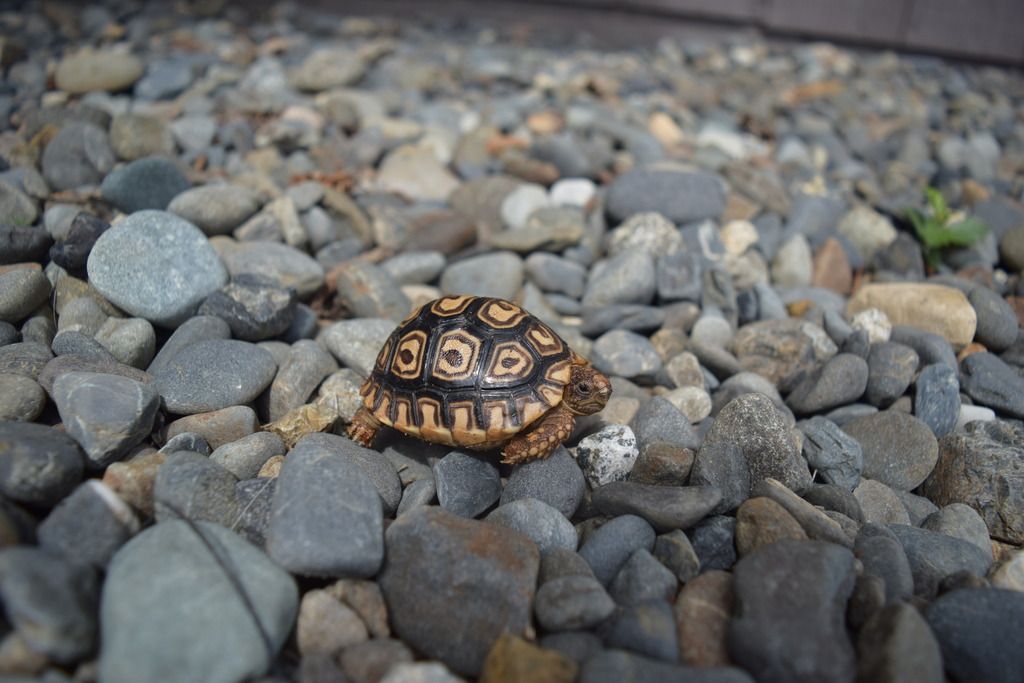
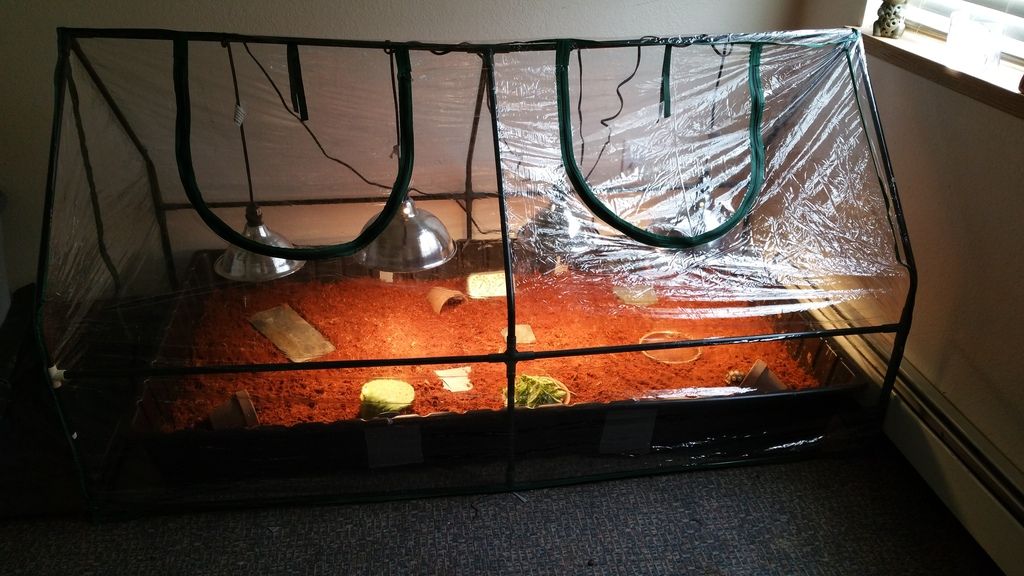
If you look closely in the third photo, you can see him in front of the flower pot on the bottom right corner for size comparison.
Here's what I have -
- 6ftx3ft floorspace
- 80-100F during the day, 80-90F at night
- 70-75% humidity (working on raising this) during the day and 90% overnight
Supplies -
- 6x3x3 Portable Greenhouse ($50)
- 3x Heavy Duty Outdoor Bins ($30/ea)
- Tarp ($10)
- 2.5 cu/ft Compressed Organic Coco Fiber ($15)
- 2 cu/ft Compressed Organic Coco Bark ($15)
- 4x Clamp Lights ($15/ea)
- Appropriate Bulbs/CHEs ($5-20/ea)
- Thermostat ($30)
- Temp Gun ($15)
- Flowerpots ($4/ea)
- Hot Glue/Gun
I started off with the tarp down, a few lights and a sweater box (all under the greenhouse) while I collected the supplies for his upgrade. This worked fine but keeping up the humidity was an uphill battle. Once I finally had all of my supplies, I began cutting the sides off my bins so they could be attached to make one large bin. I do not have access to power tools and my local hardware store was honest and told me they can't make accurate cuts. I used pocket saws to cut out the area I wanted on each of the bins. Once the sides were removed, I secured them together with hot glue, patching any holes with the lid of a rubbermaid container. I made sure ALL cut edges were thoroughly coated with hot glue so if for any reason they surfaced he would not get hurt. This was one of the hardest parts for me, although I'm sure it'd be easier if you had clamps to hold the bins together for you while each section of glue dried. Once that was done, I began soaking the coir bricks, mixing the bark and coir together thoroughly and draining any excess water. 10lb bricks from my local hydroponics shop were the way to go and I love the quality difference between this and pet quality bricks. It's night and day. Once that was complete, I slid the bins over the tarp (to protect my carpet from condensation). I placed the frame of the greenhouse over the bin and got all of my lights arranged and plugged in because of where my outlet is placed. Once I had everything situated, I got everything turned on, let it heat up to 80F and placed him in.
Even though my little man is a 3 months old hatchling, he uses EVERY INCH of this enclosure. I'd go as far to say he loves it and I could NOT be happier watching him literally run from one end to the other, trample his cactus pads, use his new hides and go on with life as a spoiled hatching. The only things we are currently having trouble acquiring because of our location is a digital hydrometer, a second CHE and a UVB bulb but we're working on it and he's being taken outside 3x weekly for UVB at the moment. All in all, this wasn't easy for me due to lack of power tools and a few personal reasons but I felt this was a fairly cheap, easy method others could benefit from.
Obligatory photo of my little man and photos of the enclosure both with and without the plastic covering added for easier viewing -
If you look closely in the third photo, you can see him in front of the flower pot on the bottom right corner for size comparison.
")